概要
AWS EC2 インスタンスに WordPress 稼働環境を構築します。
WEB サーバは Nginx、データベースは MariaDB、WordPress のメインスクリプト言語である PHP をインストールします。
phpMyAdmin の導入により、WordPress のデータベースを WEB ブラウザから操作可能にします(phpMyAdmin はセキュリティのためには導入しないほうがよいでしょう。本番環境などセキュア的に万全な状態を保持したい環境には導入しないこと)。
環境及び設定
■アプリケーションおよび OS イメージ (Amazon マシンイメージ)
Amazon Linux 2 Kernel 5.10 AMI 2.0.20230119.1 x86_64 HVM gp2
■インスタンスタイプ
t3.small
■キーペア (ログイン)
hogehoge.pem(設定は割愛)
■ファイアウォール (セキュリティグループ)
| プロトコル | ポート | ソース |
|---|---|---|
| TCP | 80 | 0.0.0.0/0 |
| TCP | 443 | 0.0.0.0/0 |
■ストレージを設定
1 x 8 GiB gp2 ルートボリューム (暗号化なし)
■高度な詳細
全てデフォルト
■Elastic IP
12.34.56.78
■ドメイン名
hogetest.com
■管理メールアドレス
hoge@hogetest.com
■データベースのパスワード
hogedbpasswd
■公開ディレクトリ
/var/www/html
手順
ssh コマンドでログインする(PuTTY)
ssh -i hogehoge.pem ec2-user@12.34.56.78
↑秘密鍵(hogehoge.pem)を用いてユーザー名(ec2-user)でIPアドレス(12.34.56.78)に接続する
(初回ログインの場合「Are you sure you want to continue connecting (yes/no)?」と聞かれるので「yes」を選択)
タイムゾーンの設定
ルート権限になります。以降、全ての手順はルート権限で行います。
$ sudo su
現在の設定を確認。この場合アメリカの標準時刻設定になっています。
$ date
Wed Mar 8 01:30:36 UTC 2023
日本の標準時刻に合わせます。
$ ln -sf /usr/share/zoneinfo/Japan /etc/localtime
$ date
Wed Mar 8 10:31:25 JST 2023
Nginx のインストール
amazon-linux-extras の確認。
$ which amazon-linux-extras
/usr/bin/amazon-linux-extras
「/usr/bin/amazon-linux-extras」と返ってきた場合以下のように入力。
$ /usr/bin/amazon-linux-extras
nginx が出力されたリストに以下のように記述されていた場合、
38 nginx1 available [ =stable ]
以下のように nginx をインストール。
$ amazon-linux-extras install nginx1
インストールが終わったら nginx のバージョンを確認。
$ nginx -v
nginx version: nginx/1.22.1
nginx初期設定ファイル(nginx.conf)のバックアップ。インストールした日がわかると良いので名前に日付を追加しましょう。
$ cp -a /etc/nginx/nginx.conf /etc/nginx/nginx.conf.20230309
nginx 設定ファイルを編集して公開ディレクトリの変更。
cp /etc/nginx/nginx.conf /etc/nginx/nginx.conf.20230208
vi /etc/nginx/nginx.conf
以下編集内容。
変更前
root /usr/share/nginx/html
変更後
root /var/www/html
nginx サービスを再起動。
systemctl restart nginx
nginx サービスを自動起動有効。
$ systemctl enable nginx
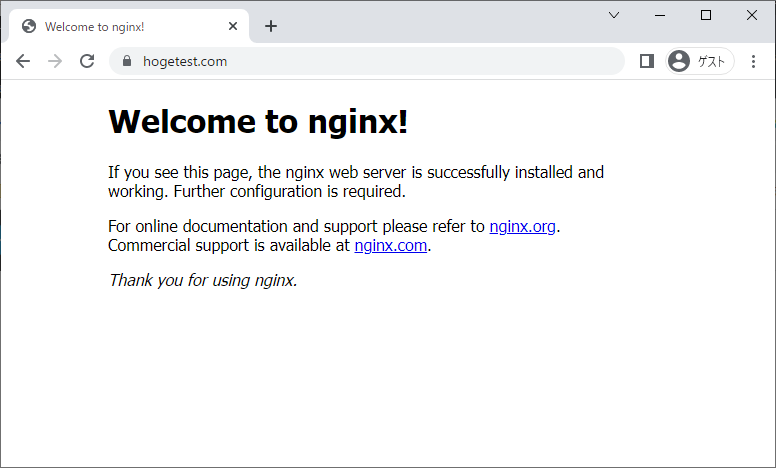
WEB ブラウザから「http://12.34.56.78」へ接続。
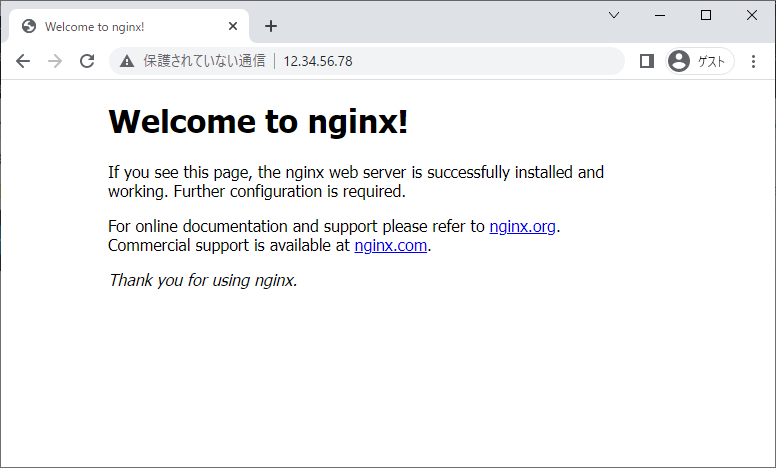
上のように表示されれば無事 nginx が稼働しています。
AWS Route 53 で Elastic IP にドメイン名を紐づける
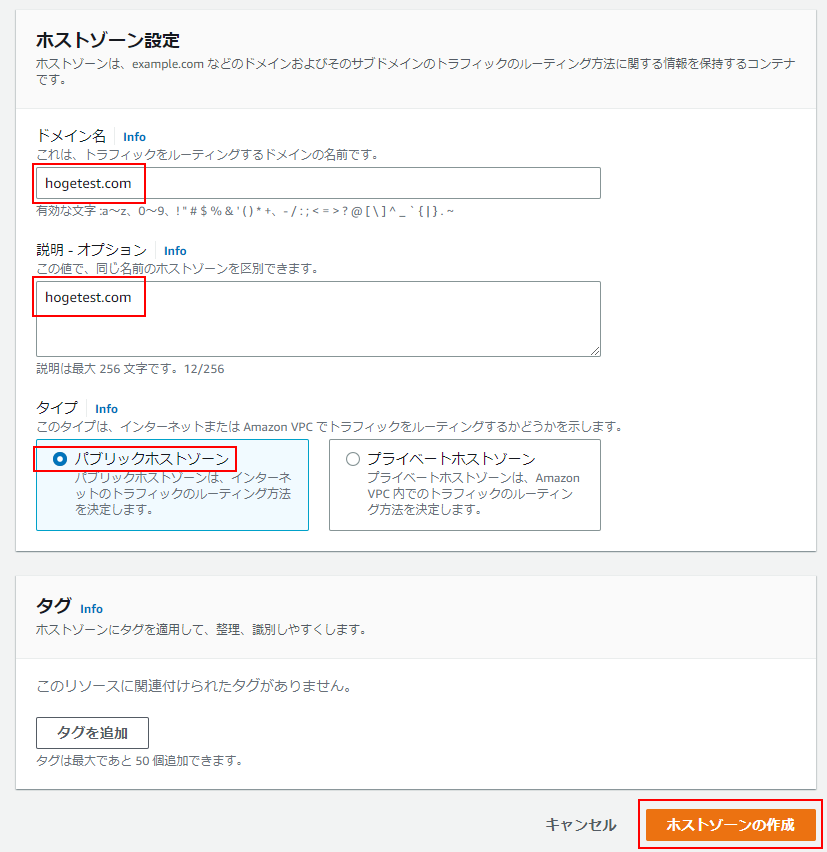
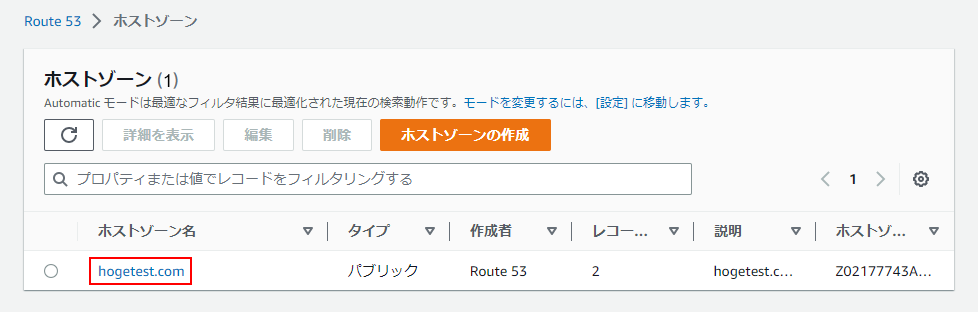
AWS Route 53 サービスを開き、左側フレームから「ホストゾーン」を選択。「ホストゾーンの作成」ボタンをクリック。

「ドメイン名」「説明」を設定して、パブリックホストゾーンを選択し「ホストゾーンの作成」ボタンをクリック。
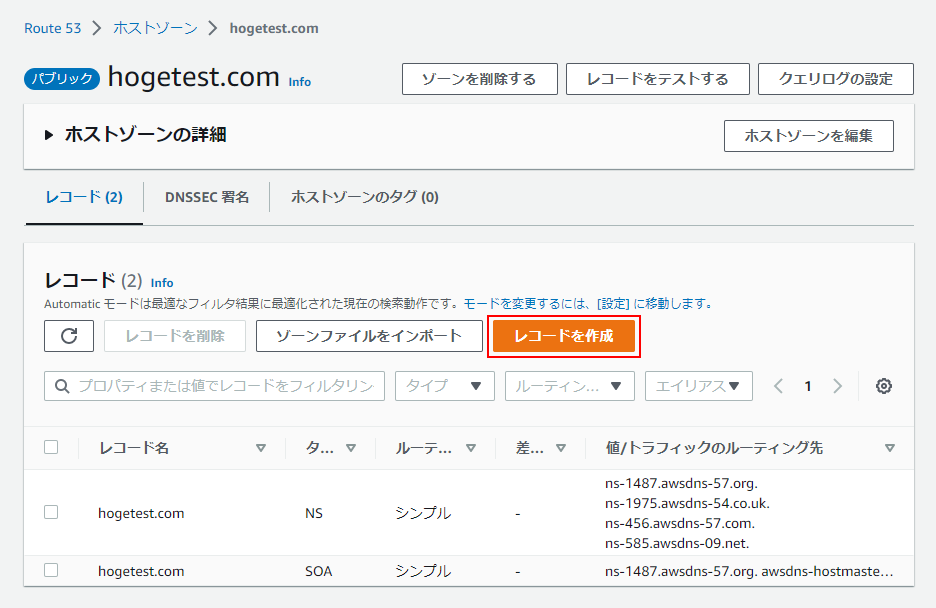
新規にホストゾーンが作成されているのを確認して、ホストゾーンをクリック。
「レコードの作成」をクリック。
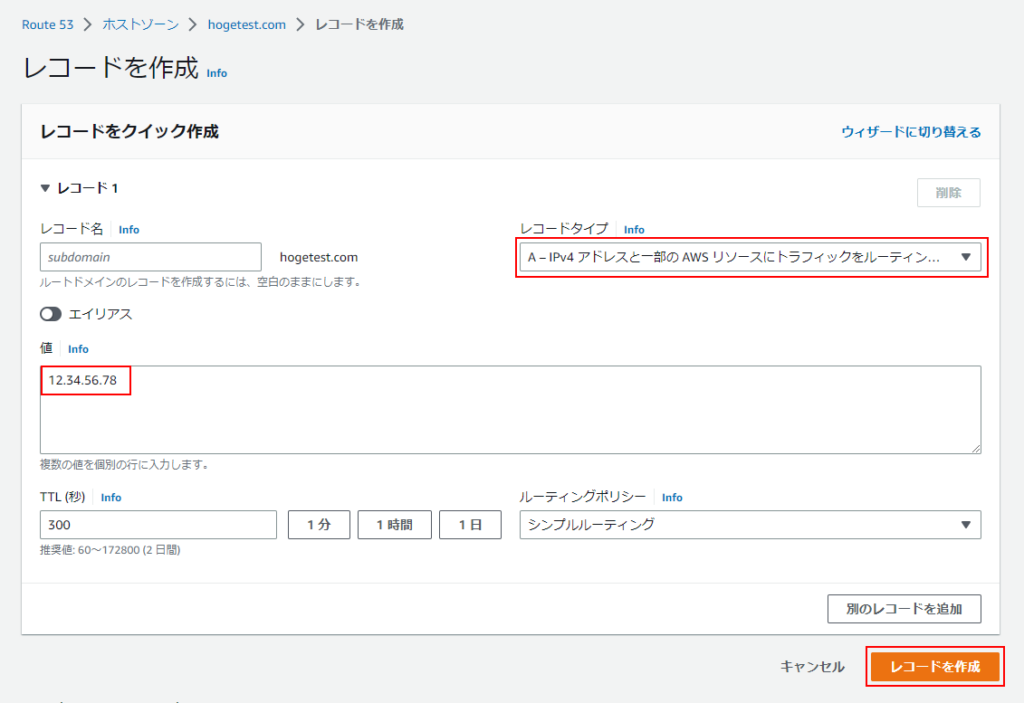
「レコードタイプ」で A レコードを選択し、値に Elastic IP を入力します。「レコードの作成」をクリック。
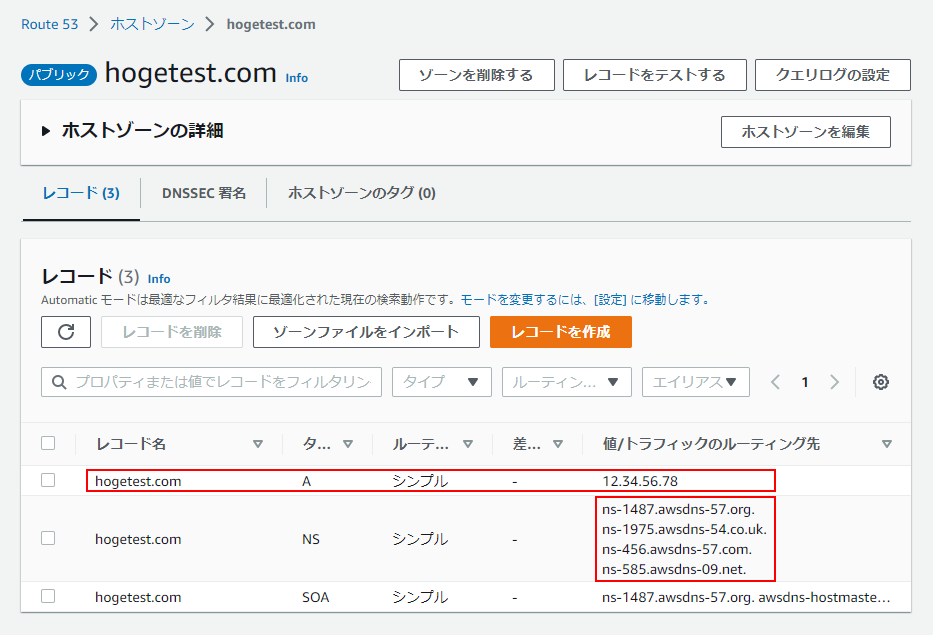
A レコードが作成されたのを確認し、NS レコードの値をメモしておく。DNS の登録をする。
WEB ブラウザから「http://hogetest.com」へ接続。

Let’s Encrypt で Nginx に SSL を設定する
サイトの Nginx 設定ファイルを編集する(この場合 hogetest.com.conf)。
vi /etc/nginx/conf.d/hogetest.com.conf
以下のように「example.com」と記述されている部分が4箇所あるので、サイト名「hogetest.com」に変更します。「ssl_certificate」と「ssl_certificate_key」のコメントアウト「#」を外します。保存して終了します。
server {
listen 80 default_server;
return 301 https://$host$request_uri;
}
server {
listen 443 ssl http2 default_server;
listen [::]:443 ssl http2 default_server;
server_name example.comhogetest.com;
root /var/www/html;
client_max_body_size 10G;
# ssl_certificate     "/etc/letsencrypt/live/example.comhogetest.com/fullchain.pem";
# ssl_certificate_key "/etc/letsencrypt/live/example.comhogetest.com/privkey.pem";

resolver 8.8.8.8; #OCSPサーバへ通信するためネームサーバを指定する

ssl_stapling on; #OCSPを有効化
ssl_stapling_verify on; #OCSPの問い合わせ結果が正しいものであることを検証する

#自身の証明書を指定する。CA証明書と中間CA証明書が1ファイルになったものを指定する必要がある。
#Let's Encryptを利用している場合はchain.pemを指定すればOK
ssl_trusted_certificate /etc/letsencrypt/live/example.comhogetest.com/chain.pem;


include /etc/letsencrypt/options-ssl-nginx.conf;

# Load configuration files for the default server block.
include /etc/nginx/default.d/*.conf;

location / {
    try_files $uri $uri/ /index.php?$args;
    #try_files $uri /index.php?query_string;
    root /var/www/html;
    index index.php index.html index.htm;
    auth_basic "Basic Authentication";
    auth_basic_user_file /etc/nginx/conf.d/.htpasswd;
}

location ~ .php$ {
    fastcgi_pass   127.0.0.1:9000;
    #fastcgi_index  index.php;
    #fastcgi_param  SCRIPT_FILENAME  $document_root/$fastcgi_script_name;
    include        fastcgi_params;

    fastcgi_split_path_info ^(.+\.php)(/.+)$;
    #fastcgi_pass wordpress:9000;
    fastcgi_index index.php;
    include fastcgi_params;
    fastcgi_param SCRIPT_FILENAME $document_root$fastcgi_script_name;
    fastcgi_param PATH_INFO $fastcgi_path_info;
    #fastcgi_cache wpcache;
    fastcgi_cache_key "$request_method:$scheme://$host$request_uri";
    fastcgi_cache_valid  200 60m;
    set $do_not_cache 0;

    if ($request_method = POST) {
      set $do_not_cache 1;
    }

    if ($query_string != "") {
      set $do_not_cache 1;
    }

    if ($http_cookie ~* "comment_author|wordpress_[a-f0-9]     |wp-postpass|wordpress_no_cache|wordpress_logged_in") {
      set $do_not_cache 1;
    }

    if ($request_uri ~* "(/wp-admin/|/xmlrpc.php|/wp-(app|cron|login|register|mail).php|wp-.*.php|/feed/|index.php|wp-comments-popup.php|wp-links-opml.php|wp-locations.php|sitemap(_index)?.xml|[a-z0-9_-]     -sitemap([0-9]     )?.xml)") {
      set $do_not_cache 1;
    }

    fastcgi_no_cache     $do_not_cache;
    fastcgi_cache_bypass $do_not_cache;
    add_header X-F-Cache $upstream_cache_status;
}

location ~* \.(jpg|jpeg|gif|png|css|js|swf|ico|pdf|svg|eot|ttf|woff)$ {
    expires 60d;
    access_log off;
}

open_file_cache max=100000 inactive=20s;
open_file_cache_valid 30s;
open_file_cache_min_uses 2;
open_file_cache_errors on;

error_page 404 /404.html;
    location = /40x.html {
}

error_page 500 502 503 504 /50x.html;
    location = /50x.html {
}
}
epelリポジトリの導入。
amazon-linux-extras | grep epel
amazon-linux-extras install epel
certbot のインストール。epelリポジトリがインストールされている状態であれば、下記コマンドでインストールできる。nginxと連携するので、nginx 向けの追加機能を提供する「python2-certbot-nginx」もインストールする。
yum -y install certbot python2-certbot-nginx
Nginx を停止して certbot 実行。
systemctl stop nginx
certbot –nginx -d hogetest.com
管理者メールアドレス(hoge@hogetest.com)を入力する。
Saving debug log to /var/log/letsencrypt/letsencrypt.log Plugins selected: Authenticator webroot, Installer None Enter email address (used for urgent renewal and security notices) (Enter ‘c’ to cancel): hoge@hogetest.com
ライセンスに同意するか聞かれるので、同意の「a」を入力。
– – – – – – – – – – – – – – – – – – – – – – – – – – – – – – – – – – – – – – – –
Please read the Terms of Service at https://letsencrypt.org/documents/LE-SA-v1.2-November-15-2017.pdf. You must agree in order to register with the ACME server at https://acme-v02.api.letsencrypt.org/directory
– – – – – – – – – – – – – – – – – – – – – – – – – – – – – – – – – – – – – – – –
(A)gree/(C)ancel: a
メーリングリストに入るかの選択(任意)をします。いいえの「n」を入力。
– – – – – – – – – – – – – – – – – – – – – – – – – – – – – – – – – – – – – – – –
Would you be willing, once your first certificate is successfully issued, to share your email address with the Electronic Frontier Foundation, a founding partner of the Let’s Encrypt project and the non-profit organization that develops Certbot? We’d like to send you email about our work encrypting the web, EFF news, campaigns, and ways to support digital freedom.
– – – – – – – – – – – – – – – – – – – – – – – – – – – – – – – – – – – – – – – –
(Y)es/(N)o: n
以下のように出力されれば完了です。Let’s Encrypt の SSL 証明書の有効期限は90日です。有効期限が切れる前に更新します。
Obtaining a new certificate
Performing the following challenges:
http-01 challenge for niikawa-test-http.oji-cloud.net
Using the webroot path /var/www/html for all unmatched domains.
Waiting for verification…
Cleaning up challenges
IMPORTANT NOTES:
Congratulations! Your certificate and chain have been saved at:
/etc/letsencrypt/live/niikawa-test-http.oji-cloud.net/fullchain.pem
Your key file has been saved at:
/etc/letsencrypt/live/niikawa-test-http.oji-cloud.net/privkey.pem
Your cert will expire on 2020-12-24. To obtain a new or tweaked
version of this certificate in the future, simply run certbot
again. To non-interactively renew all of your certificates, run
“certbot renew”
If you like Certbot, please consider supporting our work by:
Donating to ISRG / Let’s Encrypt: https://letsencrypt.org/donate
Donating to EFF: https://eff.org/donate-le
Nginx を起動します。
systemctl start nginx
WEB ブラウザから「https://hogetest.com」へ接続。ドメイン名の前に鍵マークが付いています。
PHPのインストール
インストールできるバージョンを確認。
$ amazon-linux-extras | grep php
リストから WordPress 推奨のものをインストール。
$ amazon-linux-extras install php8.1
バージョン確認。
$ php -v
PHP 設定ファイル(php.ini)のバックアップ。
$ cp /etc/php.ini /etc/php.ini.20230309
設定ファイルの編集。
$ vi /etc/php.ini
以下編集内容。
編集前
max_execution_time = 30
max_input_time = 30
memory_limit = 128M
display_errors = Off
post_max_size = 8M
upload_max_filesize = 2M
default_soket_timeout = 60
編集後
max_execution_time = 300000
max_input_time = 300000
memory_limit = 128G
display_errors = On
post_max_size = 128G
upload_max_filesize = 128G
default_socket_timeout = 300000
変更して保存
nginx サービスを再起動。
$ systemctl restart nginx
PHP関連のパッケージをインストール
パッケージのアップデートをします。
$ yum update -y
インストールされている PHP モジュールの確認をします。
$ php -m
必要なパッケージをインストールします。
$ yum install -y php-mbstring php-opcache php-gd php-xml
Complete! と出たらインストール成功です。
MariaDB をインストールする
MariaDB のバージョンを確認。
$ amazon-linux-extras | grep mariadb
MariaDB が出力されたリストに以下のように記述されていた場合、
54 mariadb10.5 available [ =stable ]
以下のように MariaDB をインストール。
$ amazon-linux-extras install mariadb10.5
mariadb サービスを起動。
$ systemctl start mariadb
mariadb サービスを自動起動有効。
$ systemctl enable mariadb
MariaDB の初期設定を開始。
$ mysql_secure_installation
以下のようなメッセージがでます。しかし、root にパスワードはまだ設定されていませんので、何も入力せず Enter キーを押します。
Enter current password for root (enter for none):
以下のメッセージが出ます。データベースの root ユーザーのパスワードをこれから設定するので「y」と入力して Enter キーを押します。
Set root password? [Y/n]
以下のメッセージが出ます。データベースのパスワード(この場合 hogedbpasswd)を2回入力します。何も表示されないので、テキストエディタにデータベースのパスワードを入力し、コピー&ペーストするとよいでしょう。
New password:
Re-enter new password:
Password updated successfully!
「y」と入力して匿名ユーザーアカウントを削除します。
Remove anonymous users? [Y/n]
「y」と入力してリモートルートログインを無効にします。
Disallow root login remotely? [Y/n]
「y」と入力してテストデータベースを削除します。
Remove test database and access to it? [Y/n]
「y」と入力して権限テーブルを再ロードし、変更を保存します。
Reload privilege tables now? [Y/n]
All done! と出ると初期設定完了です。
ImageMagickインストール
以下の URL から最新のソースを確認します。
https://imagemagick.org/script/install-source.php#linux
ライブラリをインストールします。
yum install -y fftw3 gcc libwebp libwebp-devel
git のインストール。
sudo yum install git-all
ソースコードからインストール。
cd /usr/local/src
git clone https://github.com/ImageMagick/ImageMagick.git ImageMagick-7.1.1
cd ImageMagick-7.1.1
./configure
make
make install
バージョン確認
/usr/local/bin/convert –version
php.ini ファイルを編集する。
vi /etc/php.ini
以下、編集内容。
extension = imagick.so
を追記
php-fpm サービスを起動。
systemctl start php-fpm
php-fpm サービスを自動起動有効。
systemctl enable php-fpm
PHPモジュールとして認識されたか確認。
php -m | grep imagick
imagick
intl のインストール
epel-releaseのアップデートを確認
yum update epel-release
現在利用しているPHPのバージョンを確認
php -v
PHP 8.1.14 (cli) (built: Jan 20 2023 18:11:30) (NTS)
remi のリポジトリを確認。
ll /etc/yum.repos.d/ | grep remi-
インストールします。
yum install http://rpms.famillecollet.com/enterprise/remi-release-8.rpm
yum -y install –enablerepo=epel,remi,remi-php81 php-intl
php-fpm と Nginx を再起動。
systemctl restart php-fpm
systemctl restart nginx
phpMyAdminをインストールする
phpMyAdmin 関連パッケージをインストールします。
$ yum install php-mbstring php-fpm -y
公開ディレクトリに移動。
$ cd /var/www/html
phpMyAdmin をダウンロードします。
$ wget https://www.phpmyadmin.net/downloads/phpMyAdmin-latest-all-languages.tar.gz
phpMyAdmin ディレクトリを作成し、phpMyAdmin パッケージを展開(解凍)します。終わったら元の tar.gz ファイルはもうは消去します。
$ mkdir phpMyAdmin && tar -xvzf phpMyAdmin-latest-all-languages.tar.gz -C phpMyAdmin –strip-components 1
$ rm -rf phpMyAdmin-latest-all-languages.tar.gz
Web フラウザから http://[パブリックDNS]/phpMyAdmin にアクセスします。下記のようなログイン画面が表示されたら、Username に 「root」、Password に MariaDB の初期設定で設定したデータベースのパスワード(hogedbpasswd)を入力して 「Go」 ボタンをクリックします。
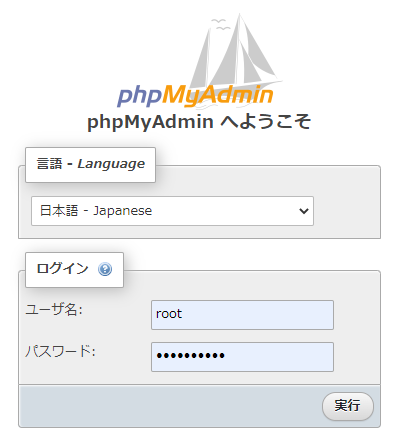
以下 phpMyAdmin のログイン画面。
WordPress をインストールする
公開ディレクトリに移動。
$ cd /var/www/html
最新の WordPress を EC2 インスタンス上にダウンロードして展開(解凍)します。
$ wget https://wordpress.org/latest.tar.gz
$ tar -xzvf latest.tar.gz
mysql で MariaDB に root ユーザーでログインします。以降 SQL 構文となります。わかりやすいように SQL コマンドを大文字で表示しますが、小文字で入力しても大丈夫です。
$ mysql -u root -p
データベースのユーザー(wordpress-user)とデータベースパスワード(hogedbpasswd)を作成します。
> CREATE USER ‘wordpress-user’@’localhost’ IDENTIFIED BY ‘hogedbpasswd’;
データベース(wordpress-db)を作成。
> CREATE DATABASE `wordpress-db`;
データベース(wordpress-db)への wordpress-user の権限を追加します。
> GRANT ALL PRIVILEGES ON `wordpress-db`.* TO “wordpress-user”@”localhost”;
データベース権限をフラッシュして、全ての変更を有効にします。
> FLUSH PRIVILEGES;
mysql を終了します。
> exit
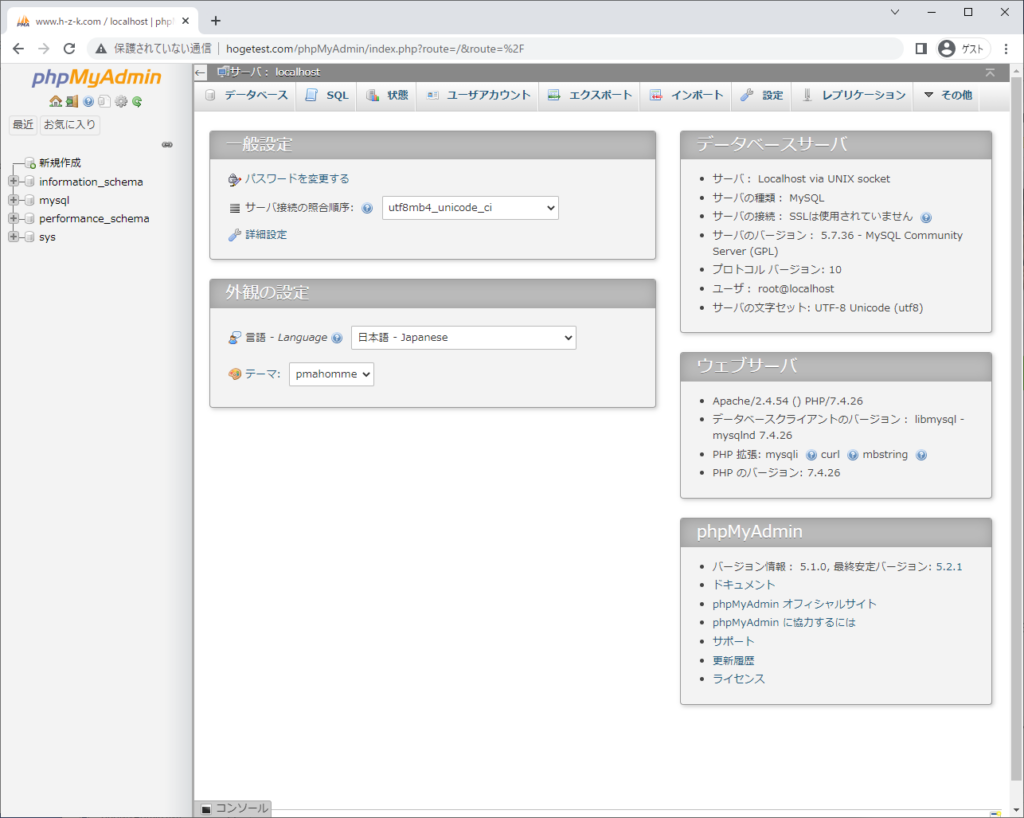
phpMyAdmin で確認すると wordpress-db が作成されています。

WordPress を設定する
wp-config-sample.php ファイルを wp-config.php という名前でコピーします。
$ cp /var/www/html/wp-config-sample.php /var/www/html/wp-config.php
wp-config.php を編集します。
$ vi /var/www/html/wp-config.php
以下、編集内容。それぞれデータベース名、データベースのユーザー、データベースパスワードを設定します。
編集前
define( ‘DB_NAME’, ‘database_name_here’ );
define( ‘DB_USER’, ‘username_here’ );
define( ‘DB_PASSWORD’, ‘password_here’ );
編集後
define( ‘DB_NAME’, ‘wordpress-db’ );
define( ‘DB_USER’, ‘wordpress-user’ );
define( ‘DB_PASSWORD’, ‘hogedbpasswd’ );
変更して保存
WEB ブラウザから「https://hogetest.com」へ接続。WordPress の初期画面が表示されます。

以上。